Polymer80 G150 Phoenix (gen 2) 80% AR lower receiver review
Polymer80 G150 80% AR lower receiver
Price - $80
Material - reinforced nylon
Finish - integrated into receiver
Color - matte black (several other colors available)
Rear pocket - completed
Trigger guard - integrated
Engravings - none
Notable features - metal insert for pistol grip screw, threaded bolt catch pin, includes proprietary jig, drill bits and end mill
Works with the 80% Arms Universal Easy Jig - yes
Works with the Modulus Arms Jig - yes
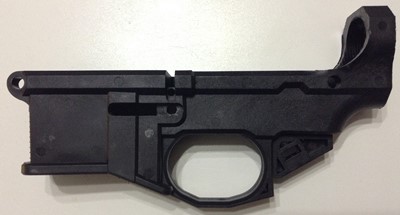
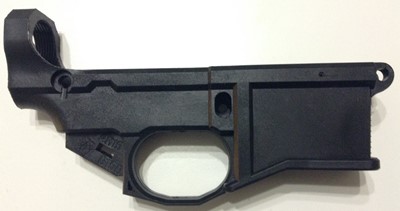

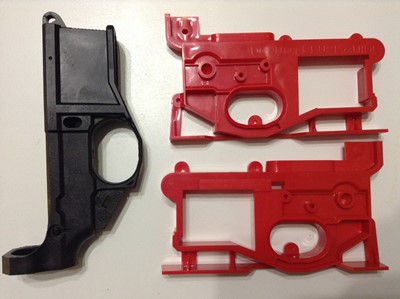
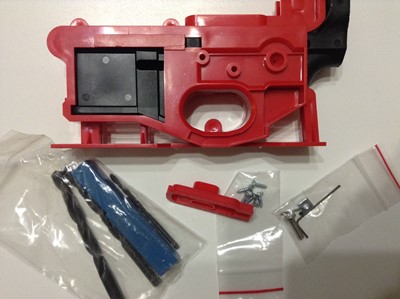
This is the second generation G150 polymer lower from Polymer80 and the second from them that I have reviewed. Both models can be Cerakoted/Duracoated or hydrodipped after machining but the Phoenix lower now comes in several colors (black, dark gray, flat dark earth, dark green, dark blue, light blue and turquoise). The Polymer80 G150 lower comes with it's own jig and a pistol grip screw and square nut insert for the pistol grip screw to thread into. I appreciate that feature because other polymer lowers like the EP Armory can be very tough to get the pistol grip screw into. The bolt catch pin is a metal dowel with a separate 6-32 Allen head cap screw that threads into the receiver to retain it. Unlike other lowers the Polymer80 kit comes with three drill bits and a 7/16" end mill. There is a lot of value added by these tools and you can pay north of $40 for them separately. The end mill is really where the money is. The pictures above show black oxide drill bits but the new drill bits provided are gold colored coated drill bits.
I machined the first G150 Phoenix with the 80% Arms Easy Jig as I do not have an X-Y vise or frankly a drill press that would readily accept one. I did recently machine a second G150 Phoenix using only a drill press and no vise. It actually worked but it took a long time and was very tedious. The end product was very clean which I was actually surprised by given the rudimentary method I was using. The included jig works.
Here is the Polymer80 YouTube video showing how to mill out the G150 using the included jig, drill bits and end mill using a drill press with an X-Y vise. Polymer is the only material I would recommend machining out with a drill press and this video shows that process. Keep in mind that the video uses some kind of magic to finish the lower because there is never any pre-drilling done. The provided end mill has a center section on the bottom of the bit that does not have cutting flutes so it can only be used as a drill bit until you hit that non-fluted section which is about 1/8" deep. You need to pre-drill your holes for the end mill to complete which neither the video nor the instruction manual tell you.
First impressions:
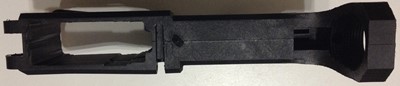
I like the new reinforced nylon material this receiver is made from. I prefer the matte finish and it is noticeably stronger than the previous polycarbonate G150 as I am not able to flex the magwell with my hand. Otherwise the receiver seems to have retained most of its previous features such as reinforced areas and the angle cut magwell. The trigger guard is very roomy and should be no problem for even large gloved hands. Overall the receiver is a good bit lighter than other polymer receivers. Without cutting the area between the already completed rear pocket and the fire control group pocket the finished receiver weighs 134g which is 19g more than its predecessor of 115g. Clearly the receiver has been further strengthened.
Fitment to the universal Easy Jig:
Good
Fitment to the Modulus Arms Jig:
Good
Ease of machining:
Per usual, the polymer proved to be very easy to machine with the 3/8" drill bit and the 1/4" end mill at 1720 RPM. It should be noted that if you go too fast the drill bit will heat up and melt the plastic. Don't be tempted to go too fast and allow the drill bit to cool down occasionally to prevent overheating and melting. I did not need to use any cutting fluids when machining this receiver.
Final thoughts:
The Polymer80 G150 Phoenix is a great value as it comes with not only the lower and jig but the drill bits and end mill to finish it. I did not use these bits as I already have a set but I have used them before and have even used the end mill to machine aluminum so they are of sufficient quality for this work. The inclusion of a jig, drill bits and end mill make this lower receiver a tremendous value especially for first time builders who do not have these items.
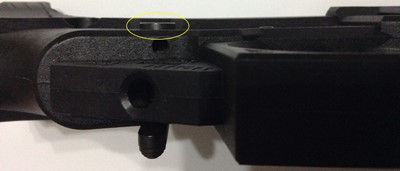
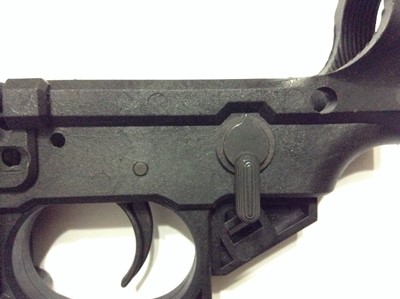
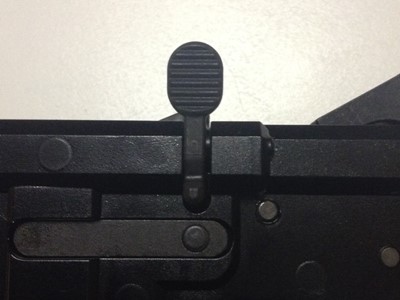
I ran into a new problem after machining this lower and that was the hammer and triggers pins as well as the selector lever stuck out too far past the receiver walls (see the top left picture below). This caused the notch in the selector lever (top right picture below) to push past the tail of the trigger. Because of this the trigger could not be pulled regardless of the selector position. It would always hit on the edge of the selector that was not notched (middle left picture below). The solution to this issue was to install a plastic washer on the selector lever before installing it in the receiver (middle right picture below). This kept the notched area of the selector above the tail of the trigger and also better aligned the safety detent with the selector (bottom left picture below). This plastic washer was also in Hillman box 58046 "Nylon Washers" and the ones you want are 58052-A (natural) or 58060-P (black) depending on the color of your receiver. You will need to sand it down to the correct thickness for your receiver.


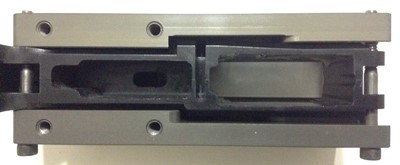
I did not have the issue of the bolt catch slot being too wide as I did with the first generation G150, the EP Armory gen1 lower and the James Madison Tactical gen1 lower. The measured difference in width between the original G150 (4.66mm) and the new one (4.34mm) was about 1/3 mm. That doesn't seem like much but after you subtract out the thickness of the bolt catch (3.83mm) the gap difference is really 0.83mm vs 0.51mm. If you should have a gap that is too large the fix is pretty easy as outlined below.
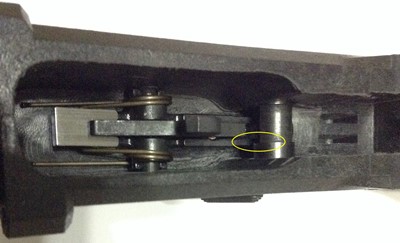
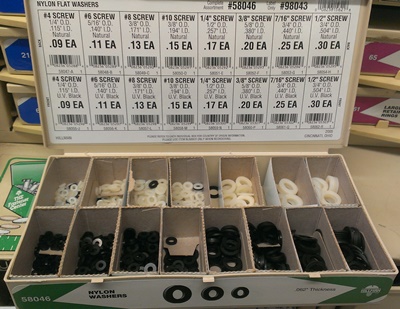
Install a thin plastic washer on the roll pin between the bolt catch and the right side of the receiver where the pin goes through (see photo below). At a gun shop I noticed a commercially made Exatar pistol polymer lower had a similar remedy so maybe it is a common problem for polymer AR lowers. I had to sand the washer down until it made the bolt catch snug enough to engage the magazine follower but loose enough not to bind in the channel. If you need a washer like this they can be found in the "Hillman" boxes at your local hardware store. They have both black and "natural" which is an off-white. The Hillman box number is 58046 "Nylon Washers" and the ones you want are 58047-A (natural) and 58055-J (black). These are the two washers in the front and back rows, furthest to the left in the photo.
Installing the cap screw into the bolt catch area required a little bit of skill. I used the included Allen wrench with the long section to initially thread the screw into the plastic. Apply some pressure to the end of the wrench so it bites into the plastic and threads the hole. Without pressure it will never grab. Start the wrench with the smaller end pointing towards the trigger guard to maximize the amount of turn you get before the smaller end hits the top of the receiver.
As with the original G150 and some of the other polymer lowers I have used (80% and commercial) I did have to do some additional machining work on the lower. Be sure to clean up any excess plastic flash (the random bits of stray plastic left over from the molding and machining process). You don't want these bits to get stuck in one of your spring or accumulating in your fire control group. On this particular lower I had to ream the front and rear detent channels which is good practice on any polymer lower because you don't want to find out too late the channel is slightly undersized. I also had to egg out the left rear takedown hole forward. The first generation EP Armory lower I machined also had this problem and others have reported it as well. My first Polymer80 gen1 did not have this problem but it's a simple matter of taking a 1/4" drill bit and using it in a drill to take out some of the front edge material. Once that was done the upper snapped right on. The magazine well was also a bit snug but a few strokes with a file took care of that. Basically it would accept all magazines I had but would not drop them free. Polymer can be a bit quirky just by the nature of its manufacture but it is also very easy to fix. Machining out a polymer 80% lower is so much faster and easier than an aluminum lower though.
The Polymer80 G150 offers a very good value in a strong polymer lower and includes the only jig and bits you will probably need to finish off your lower. No other 80% lower available offers the lower the jig and the bit set for only $80.
80% lower receiver comparison chart